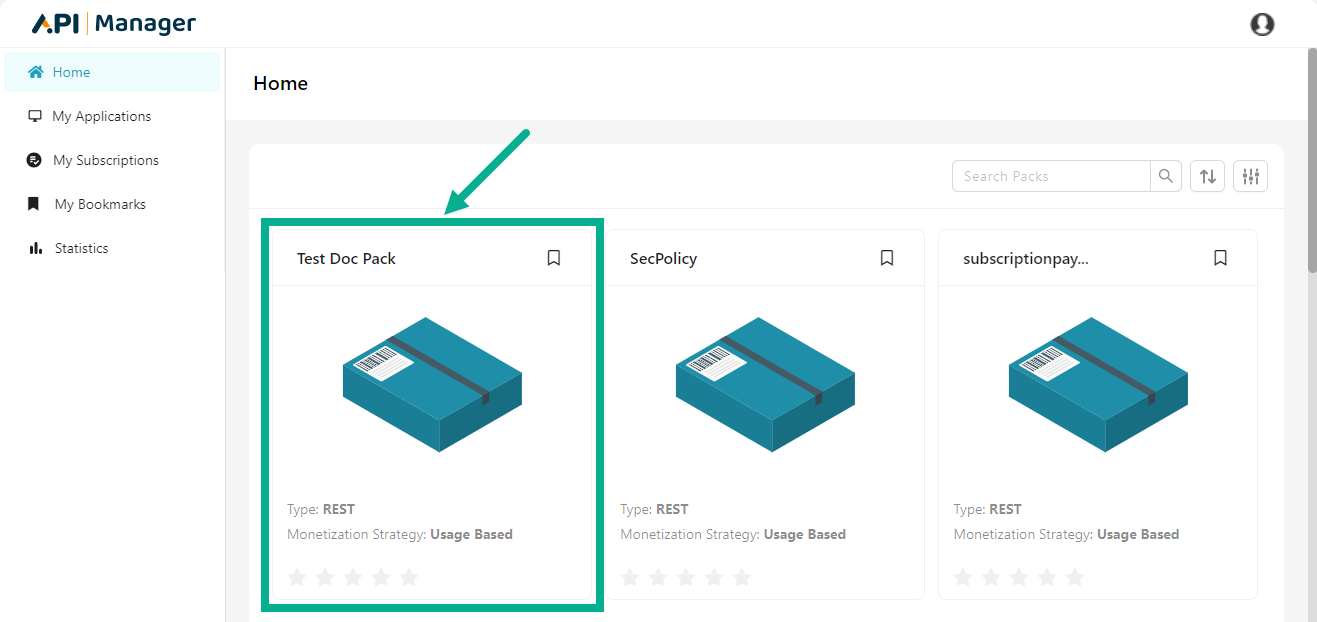
Home
The Home page showcases published API Packs for consumption. You can easily browse and select packs using the Category menu and sorting options. Choose a category from the sidebar to filter packs and adjust the display order as needed. The search feature allows you to find specific APIs by entering keywords, which matches pack names or descriptions closely.

Filter the API Pack by category selection
- Click Categories icon.
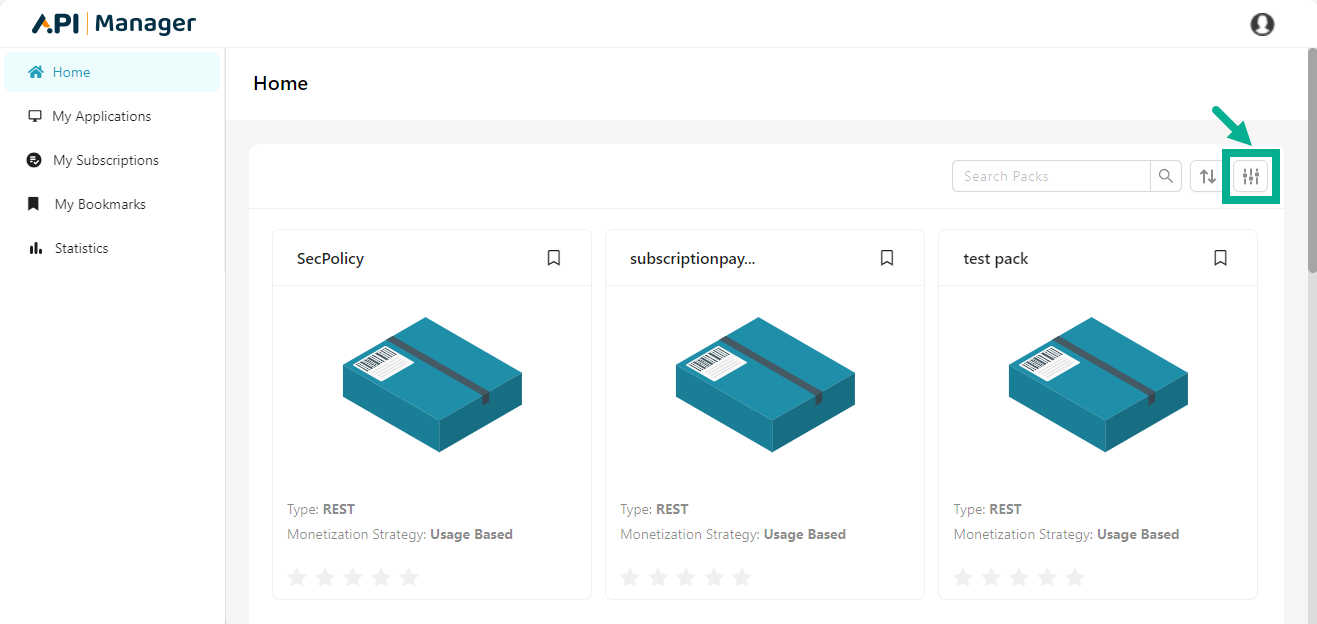
The side bar appears as shown below.
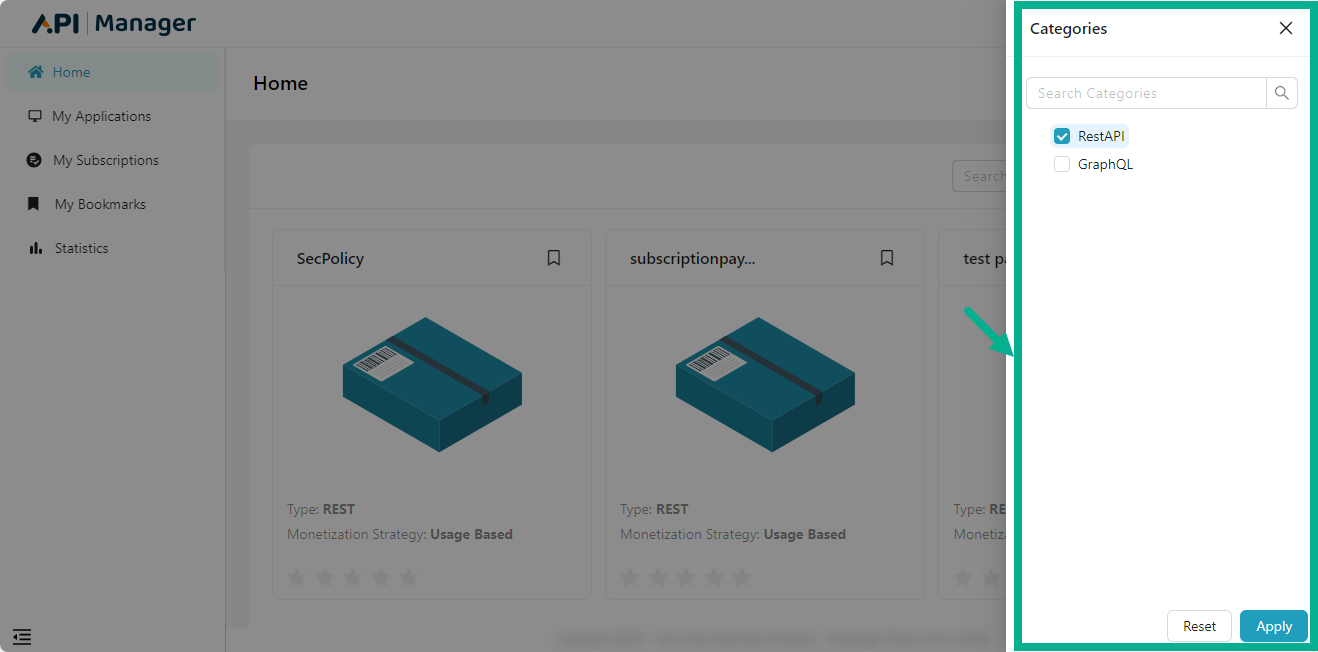
If required, use the search feature to quickly search for a category.
-
Select the appropriate category by clicking the corresponding checkbox.
-
Click Apply.
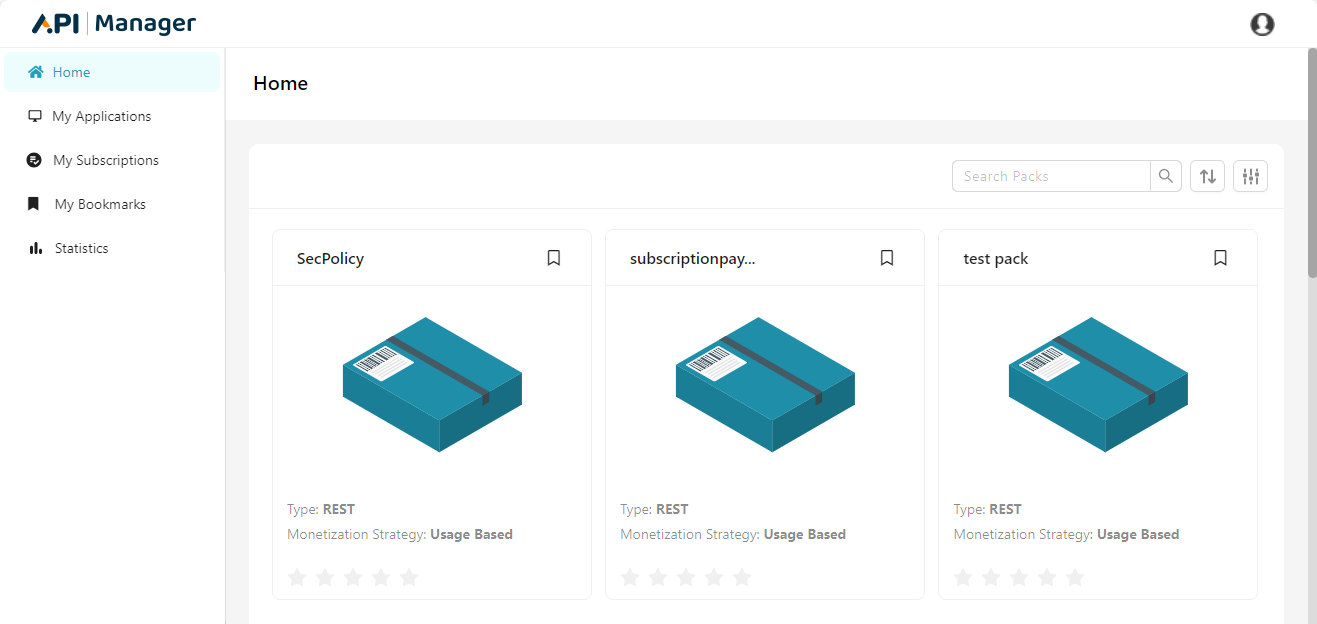
The API Packs in that category are displayed as shown below.
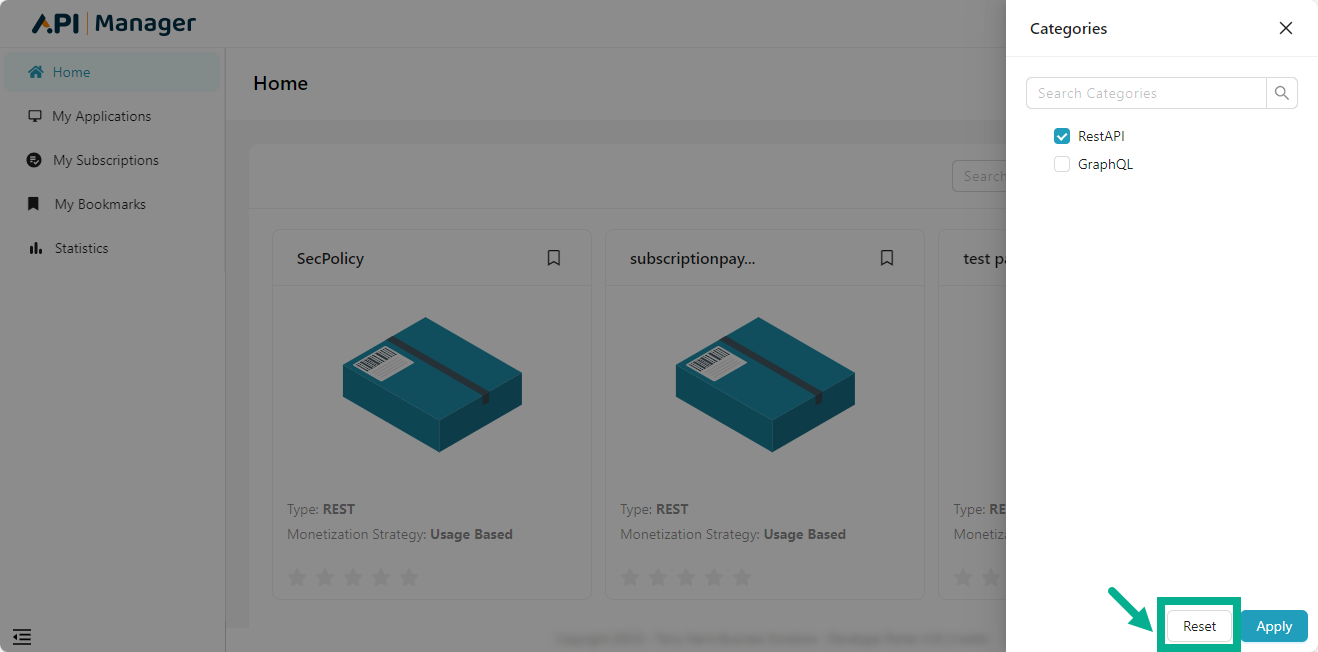
- Click Categories icon and click the Reset button to reset the filter.
Search by keyword(s)
The Search functionality searches for keyword matches in API Pack names, API Plans and short and detailed descriptions to display results. It provides quick search results and word suggestions. Search results are ordered based on exact matches and closely related results.
You can search for a certain term or keyword(s).
- Enter keywords in the search box located at the top right corner.

- Click the keyboard's Enter button or click Search icon.
The search result that matches the keyword is displayed as shown below.
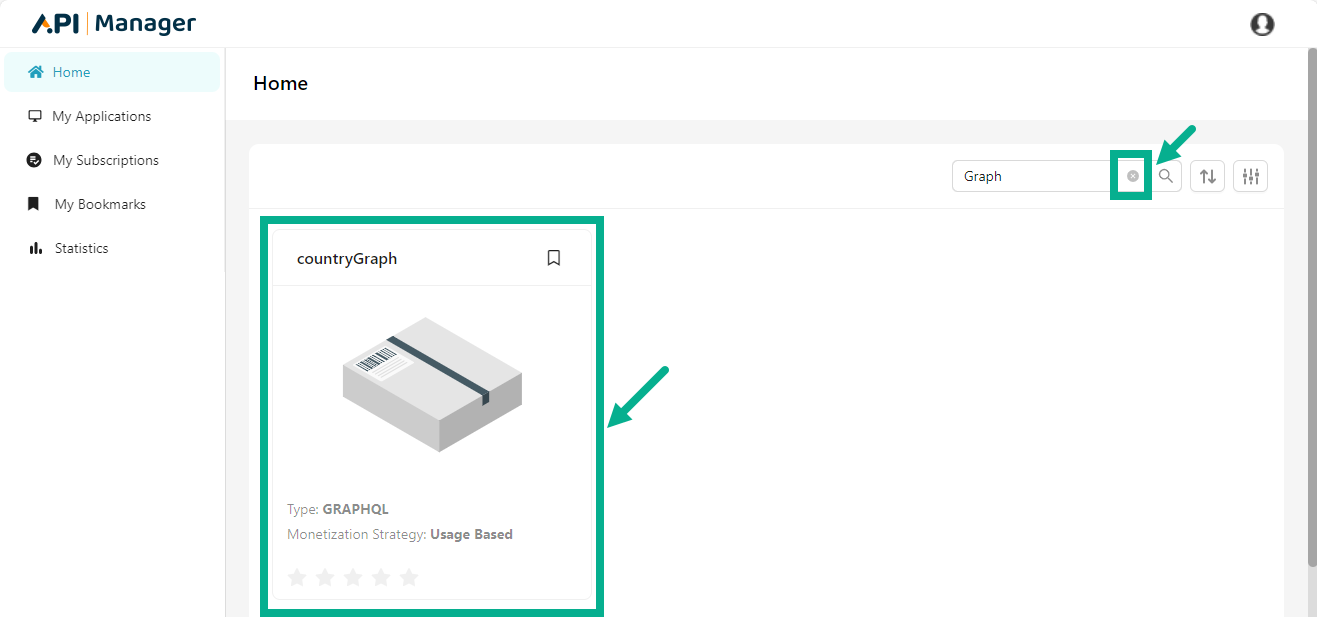
- Click the Close icon to close the clear the search results.
Subscribe to a Plan
You can subscribe to Plans under a Pack that contains the set of resources/operations you wish to use in your application. As an API subscriber, you may also select from several plans created by the Publisher user for the Pack based on their Throttling and Rate Limiting policies.
THAPIM offers three types of plans.
- Free Plan.
- Prepaid Plan
- Postpaid Plan.
Subscribe to a Free Plan
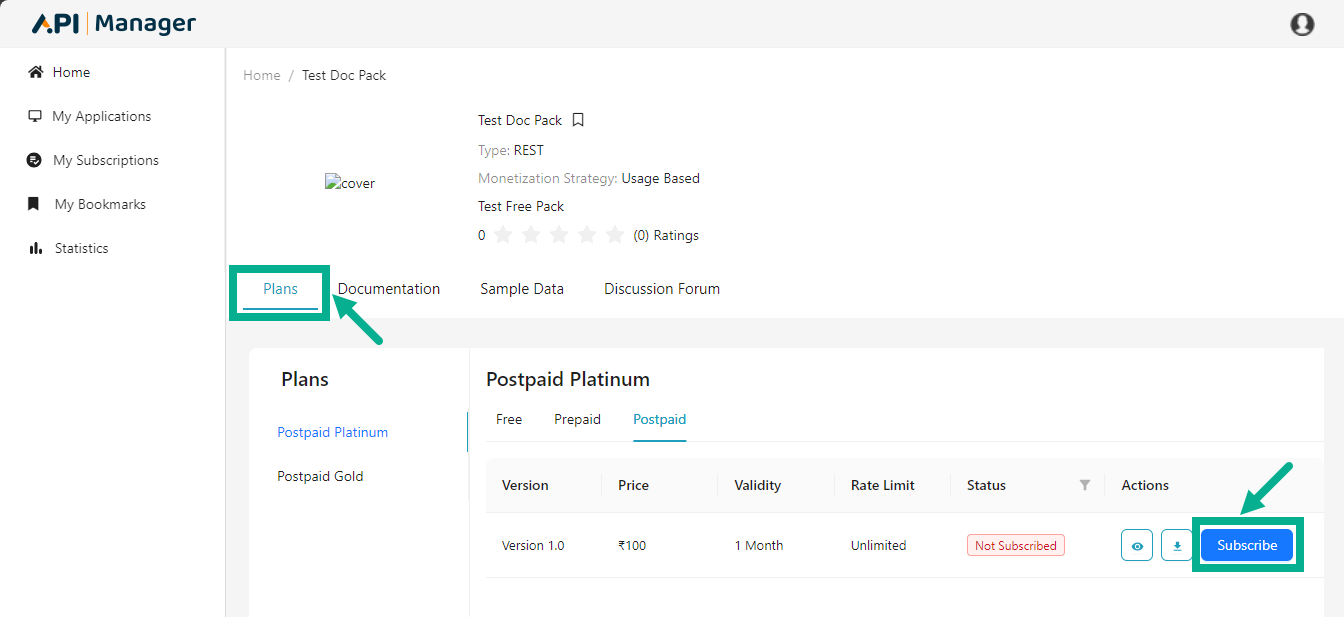
- Click on the API Pack to which you wish to subscribe.
The Plan page appears as shown below.
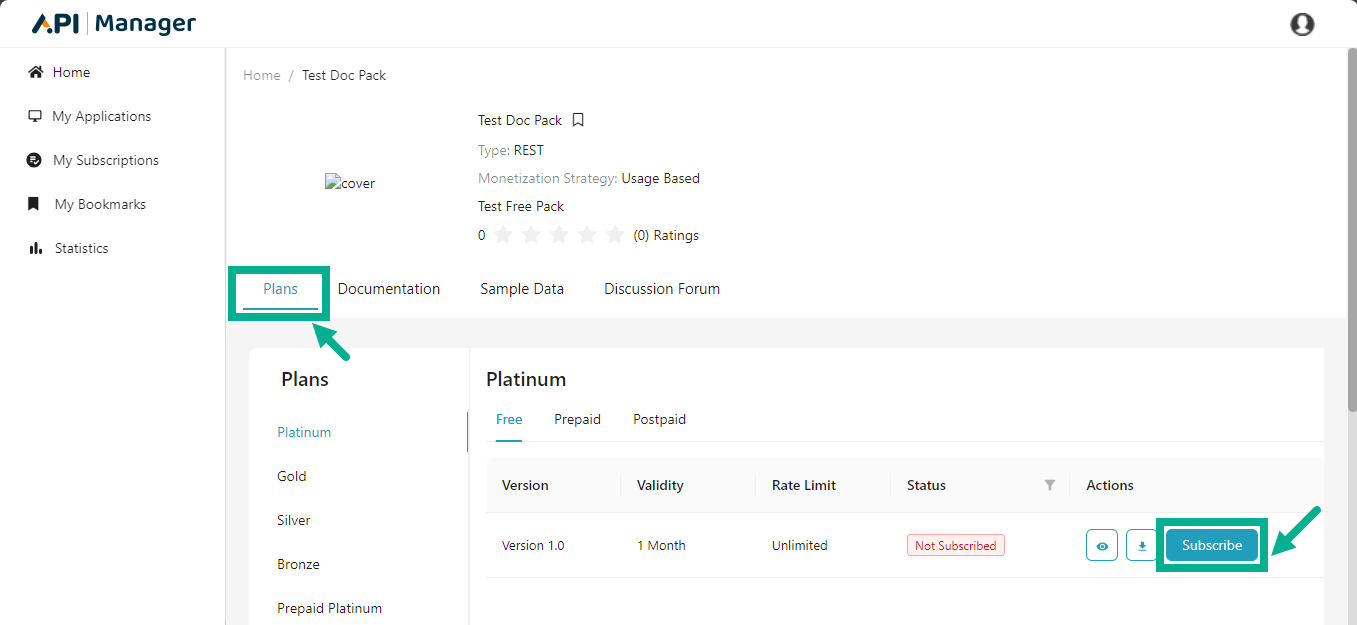
- Click Subscribe.
-
Click the View icon to view the Resources/operations available in the plan.
-
Click the Download icon to download the Resources/operations if necessary.
-
The screen below will vary depending on the Authentication Type selected at the Plan level (Subscription key, IP Whitelisting, Header Key, Query Parameter).
If Subscription key is selected as the Authentication Type.
The pop-up appears as shown below.
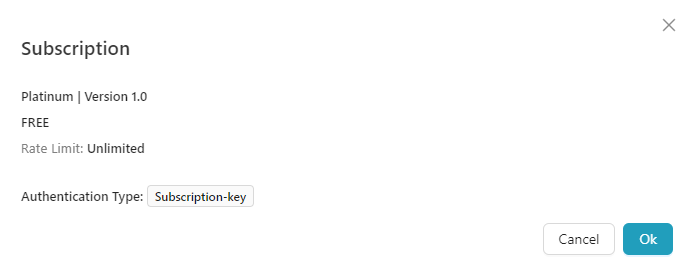
- Click Ok.
Click the Cancel button to terminate the subscription process.
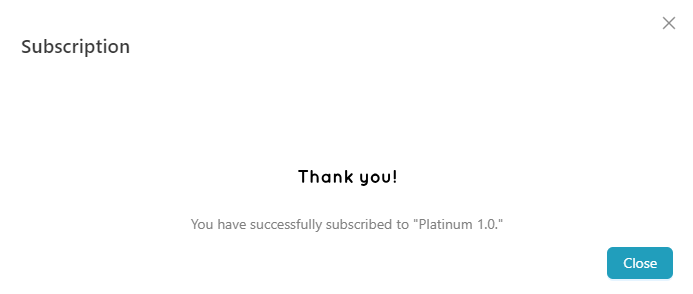
Upon subscribing, the respective plan is updated as shown below.
If IP Whitelisting is selected as the Authentication Type.
The pop-up appears as shown below.
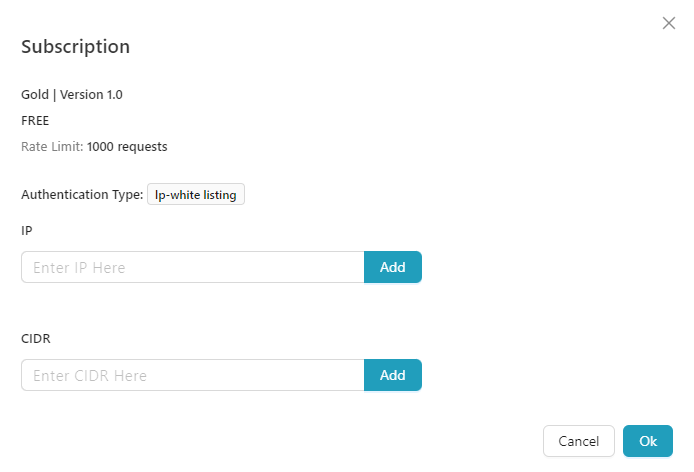
-
Enter IP value and click Add.
-
Enter CIDR value and click Add.
-
Click Ok.
Upon subscribing, the respective plan is updated as shown below.

If Header Key is selected as the Authentication Type.
The pop-up appears as shown below.
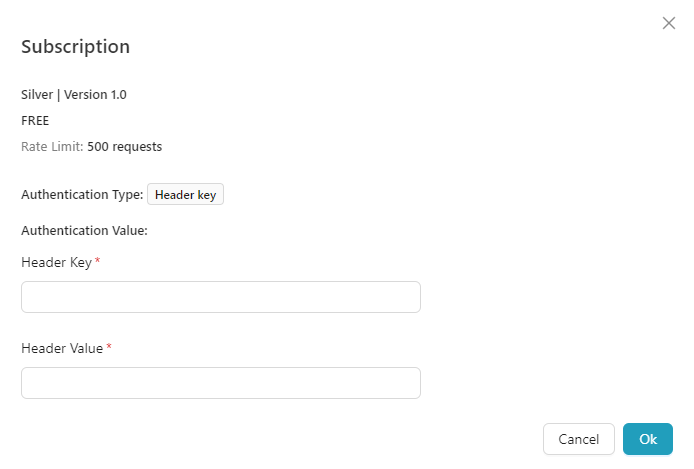
-
Enter Header Key and Header Value.
-
Click Ok.
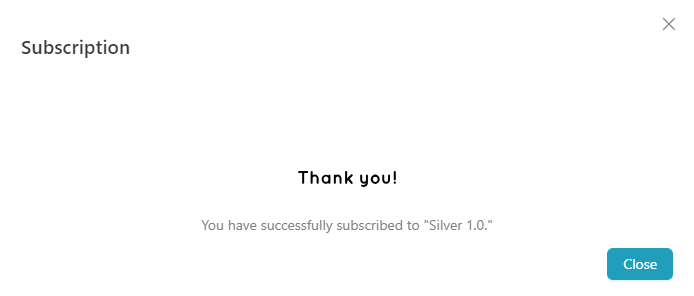
Upon subscribing, the respective plan is updated as shown below.
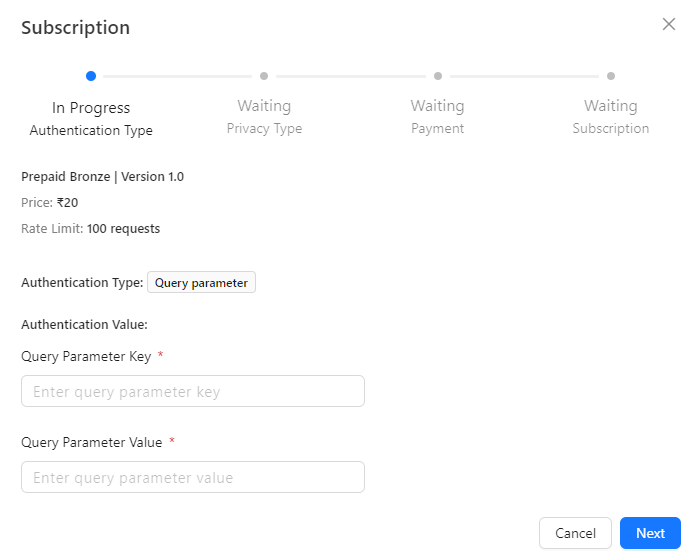
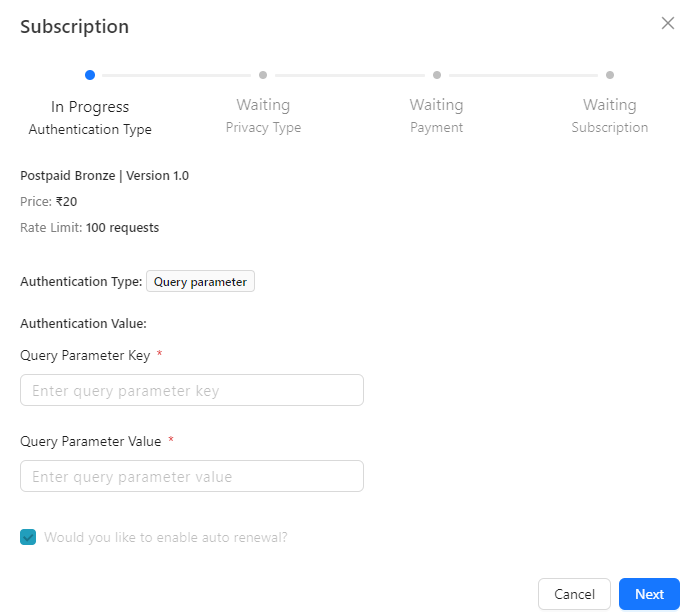
If Query Parameter is selected as the Authentication Type.
The pop-up appears as shown below.
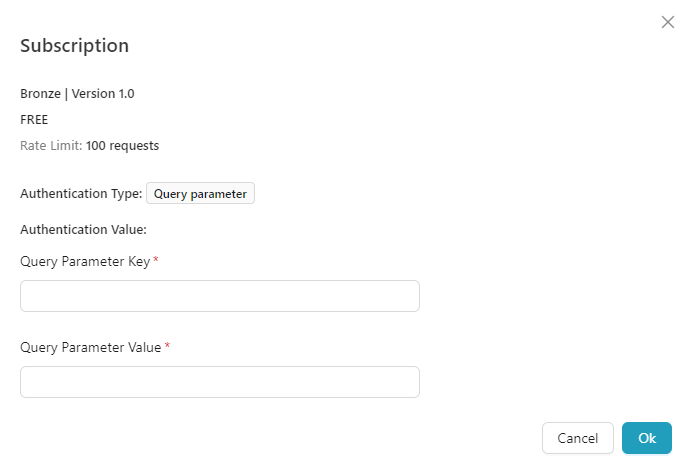
-
Enter the Query Parameter Key and Query Parameter Value.
-
Click Ok.
Upon subscribing, the respective plan is updated as shown below.

Subscribe to a Prepaid Plan
- Click on the API Pack to which you wish to subscribe.
The Plan page appears as shown below.

- Click Subscribe.
-
Click the View icon to view the Resources/operations available in the plan.
-
Click the Download icon to download the Resources/operations if necessary.
-
The screen below will vary depending on the Authentication Type selected at the Plan level (Subscription key, IP Whitelisting, Header Key, Query Parameter).
If Subscription key is selected as the Authentication Type.
The pop-up appears as shown below.
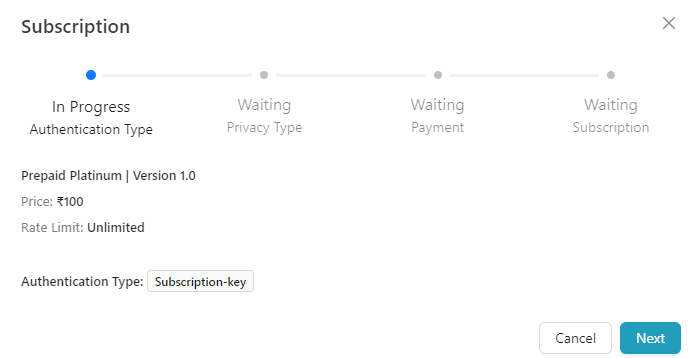
- Click Next.
Click the Cancel button to terminate the subscription process.

-
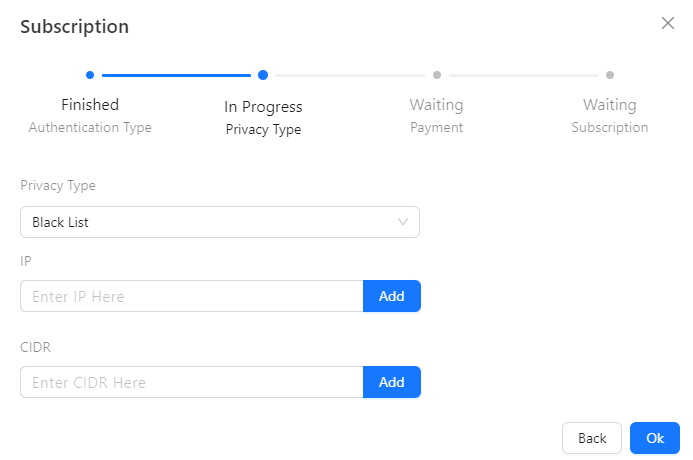
Select the Privacy Type as either Black List or White List.(Optional).
-
Enter the IP and Click Add.(Optional).
-
Enter the CIDR and Click Add.(Optional).
-
Click Ok.

- Select the Payment Gateway from the drop down.
THAPIM supports the following payment gateways:
- RazorPay
- Stripe
The screens shown below appear if Razorpay is used as the payment gateway:
The screens shown below appear if Stripe is used as the payment gateway:

a. Enter Email, Card information, Cardholder name and Billing address.
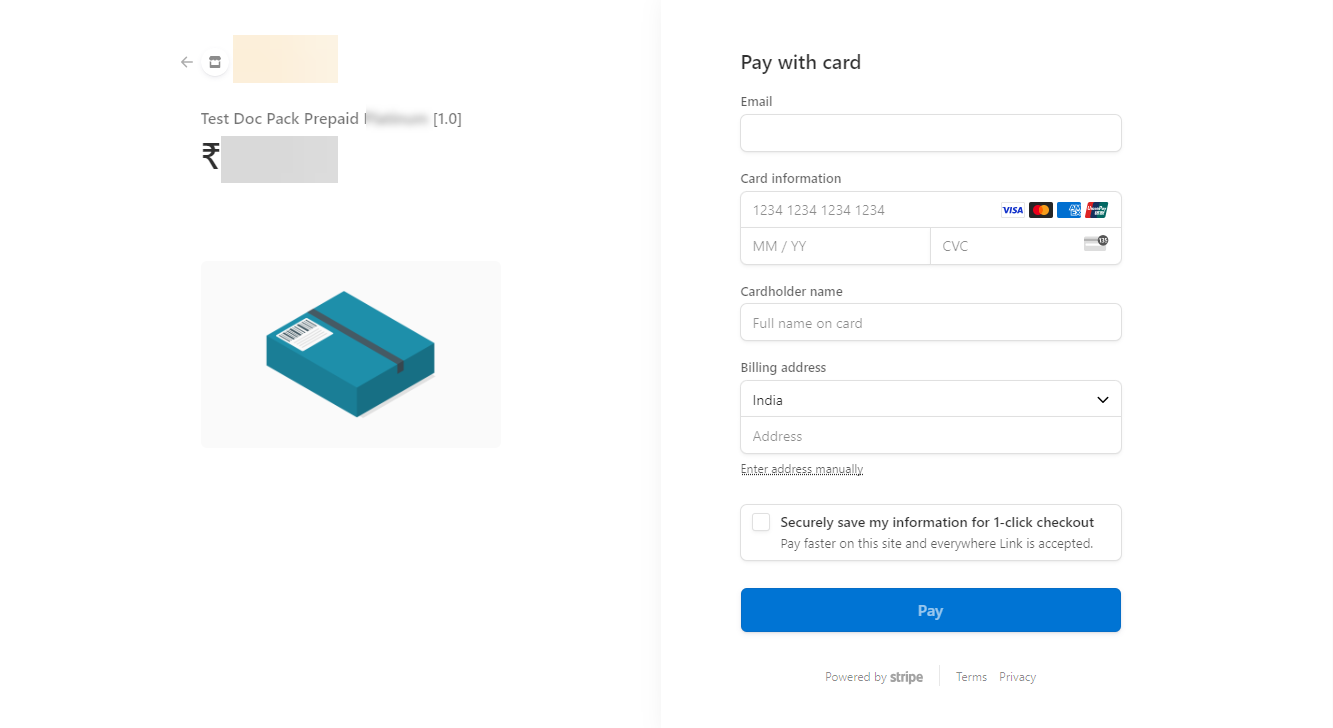
b. Click Pay.
On successful payment, the screen as shown below.

If IP Whitelisting is selected as the Authentication Type.
The pop-up appears as shown below.
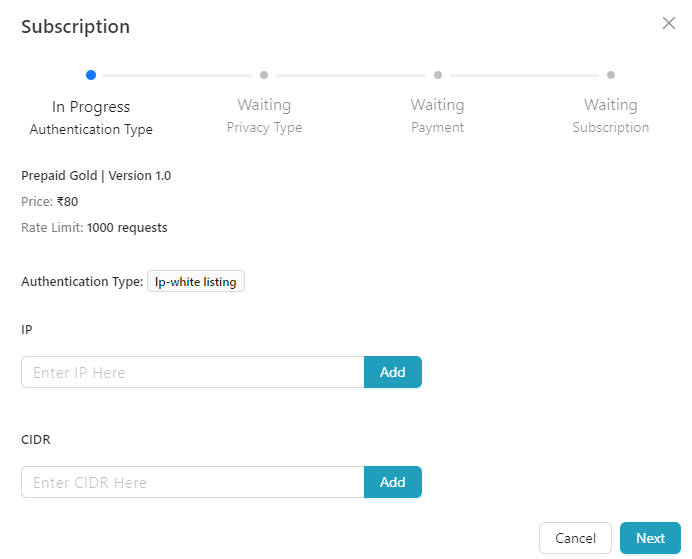
-
Enter IP value and click Add.
-
Enter CIDR value and click Add.
-
Click Next.

-
Select the Privacy Type as either Black List or White List.(Optional).
-
Enter the IP and Click Add.(Optional).
-
Enter the CIDR and Click Add.(Optional).
-
Click Ok.
- Select the Payment Gateway from the drop down.
THAPIM supports the following payment gateways:
- RazorPay
- Stripe
The screens shown below appear if Razorpay is used as the payment gateway:
The screens shown below appear if Stripe is used as the payment gateway:
a. Enter Email, Card information, Cardholder name and Billing address.
b. Click Pay.
On successful payment, the screen as shown below.
If Header Key is selected as the Authentication Type.
The pop-up appears as shown below.

-
Enter Header Key and Header Value.
-
Click Next.
-
Select the Privacy Type as either Black List or White List.(Optional).
-
Enter the IP and Click Add.(Optional).
-
Enter the CIDR and Click Add.(Optional).
-
Click Ok.
- Select the Payment Gateway from the drop down.
THAPIM supports the following payment gateways:
- RazorPay
- Stripe
The screens shown below appear if Razorpay is used as the payment gateway:
The screens shown below appear if Stripe is used as the payment gateway:
a. Enter Email, Card information, Cardholder name and Billing address.
b. Click Pay.
On successful payment, the screen as shown below.
If Query Parameter is selected as the Authentication Type.
The pop-up appears as shown below.
-
Enter the Query Parameter Key and Query Parameter Value.
-
Click Next.
-
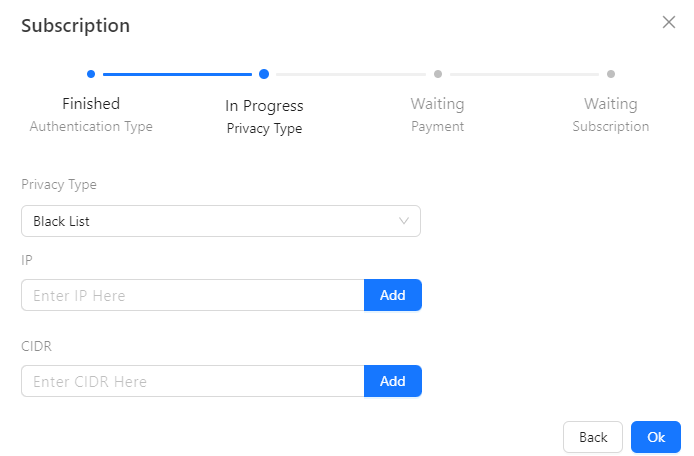
Select the Privacy Type as either Black List or White List.(Optional).
-
Enter the IP and Click Add.(Optional).
-
Enter the CIDR and Click Add.(Optional).
-
Click Ok.
- Select the Payment Gateway from the drop down.
THAPIM supports the following payment gateways:
- RazorPay
- Stripe
The screens shown below appear if Razorpay is used as the payment gateway:
The screens shown below appear if Stripe is used as the payment gateway:
a. Enter Email, Card information, Cardholder name and Billing address.
b. Click Pay.
On successful payment, the screen as shown below.
Subscribe to a Postpaid Plan
- Click on the API Pack to which you wish to subscribe.
The Plan page appears as shown below.
- Click Subscribe.
-
Click the View icon to view the Resources/operations available in the plan.
-
Click the Download icon to download the Resources/operations if necessary.
-
The screen below will vary depending on the Authentication Type selected at the Plan level (Subscription key, IP Whitelisting, Header Key, Query Parameter).
If Subscription key is selected as the Authentication Type.
The pop-up appears as shown below.
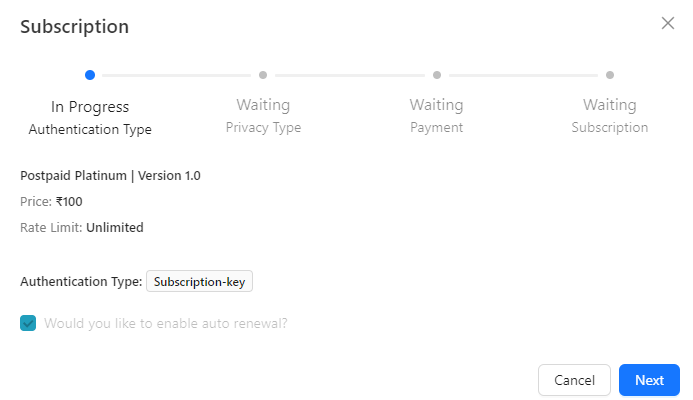
- Click Next.
Click the Cancel button to terminate the subscription process.
-
Select the Privacy Type as either Black List or White List.(Optional).
-
Enter the IP and Click Add.(Optional).
-
Enter the CIDR and Click Add.(Optional).
-
Click Ok.
- Select the Payment Gateway from the drop down.
THAPIM supports the following payment gateways:
- RazorPay
- Stripe
The screens shown below appear if Razorpay is used as the payment gateway:
The screens shown below appear if Stripe is used as the payment gateway:
a. Enter Email, Card information, Cardholder name and Billing address.
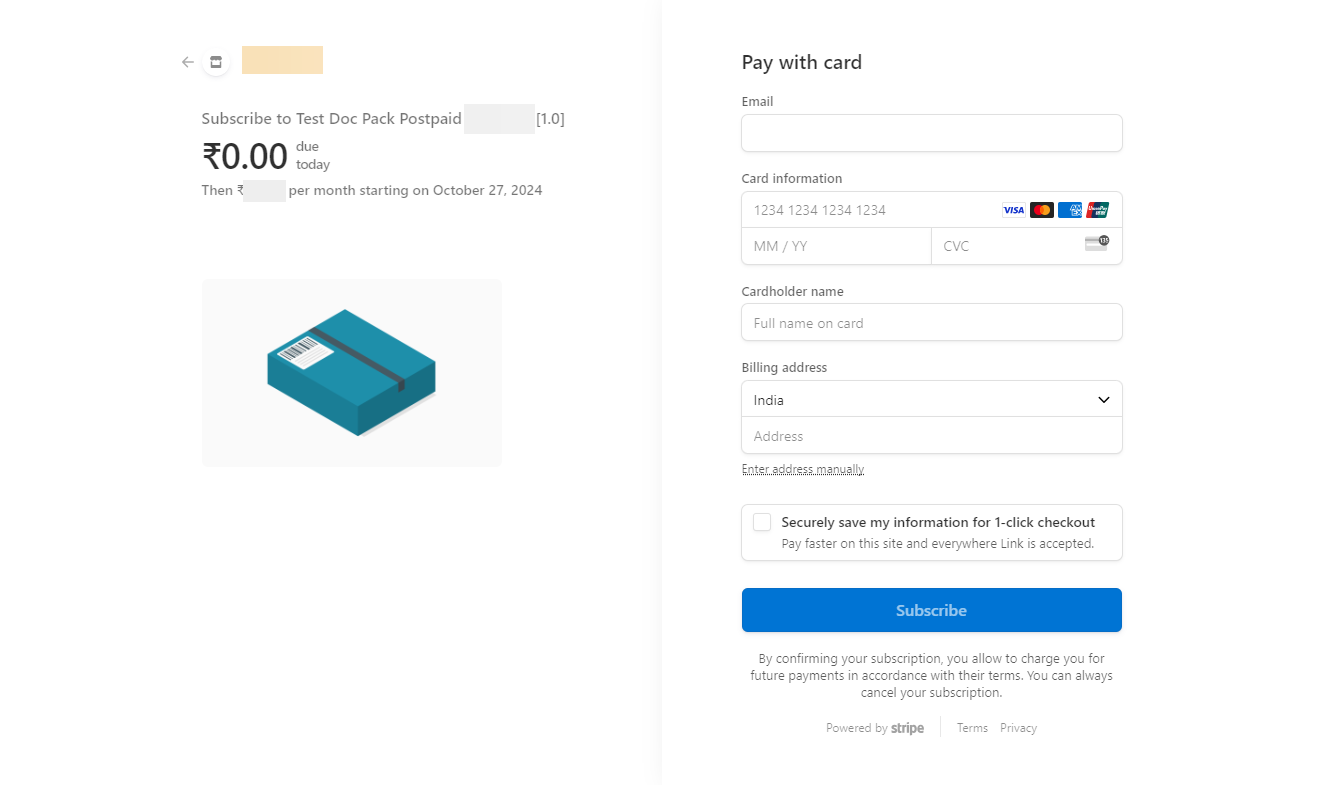
b. Click Subscribe.
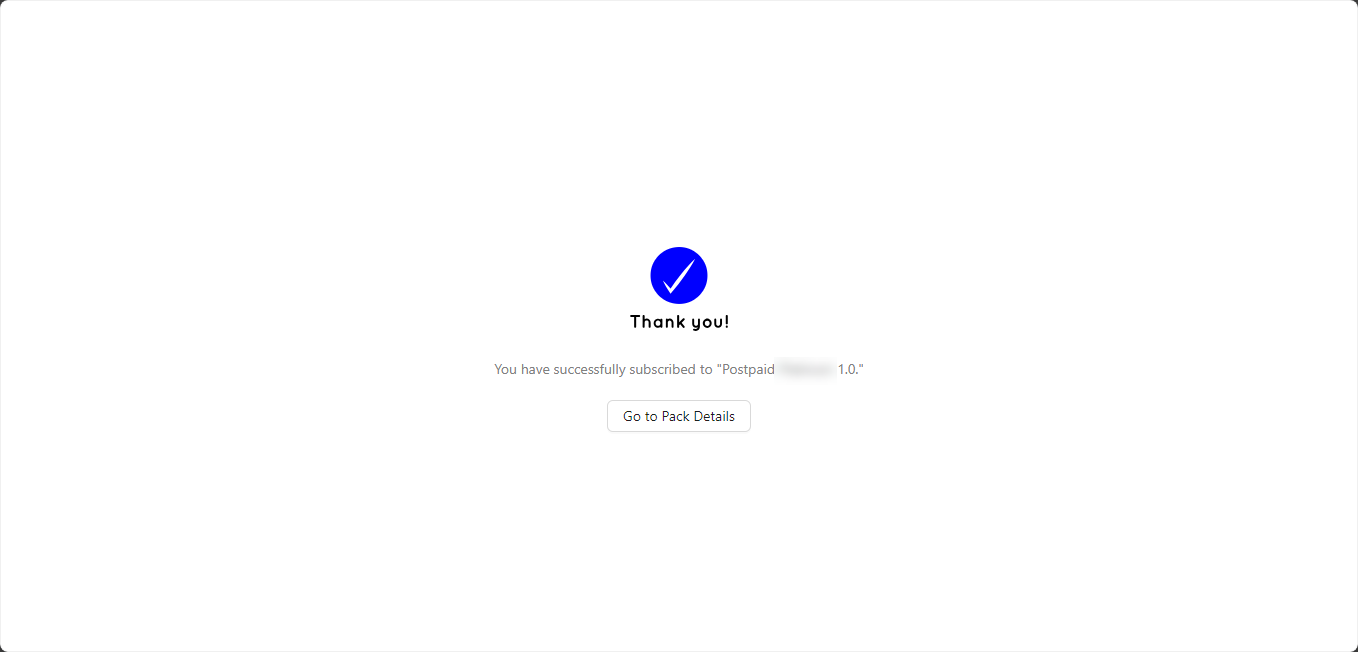
On proceeding, the screen as shown below.
If IP Whitelisting is selected as the Authentication Type.
The pop-up appears as shown below.
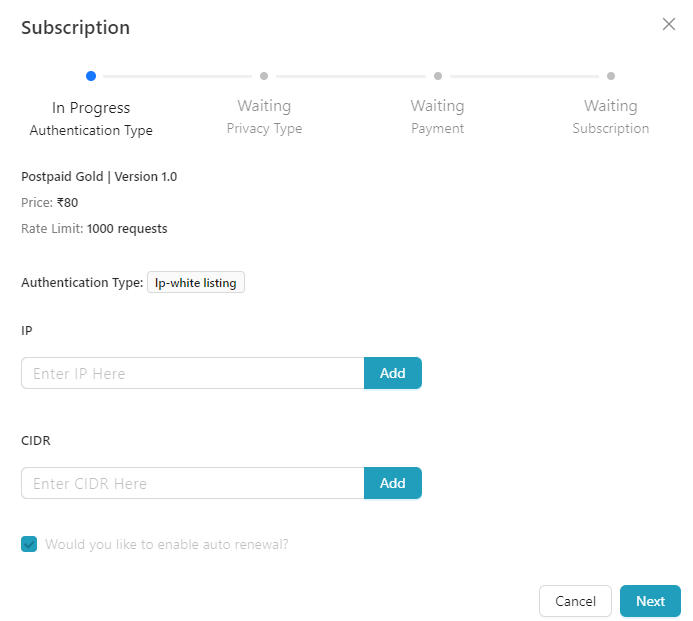
-
Enter IP value and click Add.
-
Enter CIDR value and click Add.
-
Click Next.
-
Select the Privacy Type as either Black List or White List.(Optional).
-
Enter the IP and Click Add.(Optional).
-
Enter the CIDR and Click Add.(Optional).
-
Click Ok.
- Select the Payment Gateway from the drop down.
THAPIM supports the following payment gateways:
- RazorPay
- Stripe
The screens shown below appear if Razorpay is used as the payment gateway:
The screens shown below appear if Stripe is used as the payment gateway:
a. Enter Email, Card information, Cardholder name and Billing address.
b. Click Subscribe.
On proceeding, the screen as shown below.
If Header Key is selected as the Authentication Type.
The pop-up appears as shown below.

-
Enter Header Key and Header Value.
-
Click Next.
-
Select the Privacy Type as either Black List or White List.(Optional).
-
Enter the IP and Click Add.(Optional).
-
Enter the CIDR and Click Add.(Optional).
-
Click Ok.
- Select the Payment Gateway from the drop down.
THAPIM supports the following payment gateways:
- RazorPay
- Stripe
The screens shown below appear if Razorpay is used as the payment gateway:
The screens shown below appear if Stripe is used as the payment gateway:
a. Enter Email, Card information, Cardholder name and Billing address.
b. Click Subscribe.
On proceeding, the screen as shown below.
If Query Parameter is selected as the Authentication Type.
The pop-up appears as shown below.
-
Enter the Query Parameter Key and Query Parameter Value.
-
Click Next.
-
Select the Privacy Type as either Black List or White List.(Optional).
-
Enter the IP and Click Add.(Optional).
-
Enter the CIDR and Click Add.(Optional).
-
Click Ok.
- Select the Payment Gateway from the drop down.
THAPIM supports the following payment gateways:
- RazorPay
- Stripe
The screens shown below appear if Razorpay is used as the payment gateway:
The screens shown below appear if Stripe is used as the payment gateway:
a. Enter Email, Card information, Cardholder name and Billing address.
b. Click Subscribe.
On proceeding, the screen as shown below.
View API Pack Documentation
The documentation for an API Pack guides you through several critical activities that will help you get started with the Pack. It offers thorough instructions for making API requests through your applications.
- Click on the API Pack.
The API Pack detail page appears as shown below.
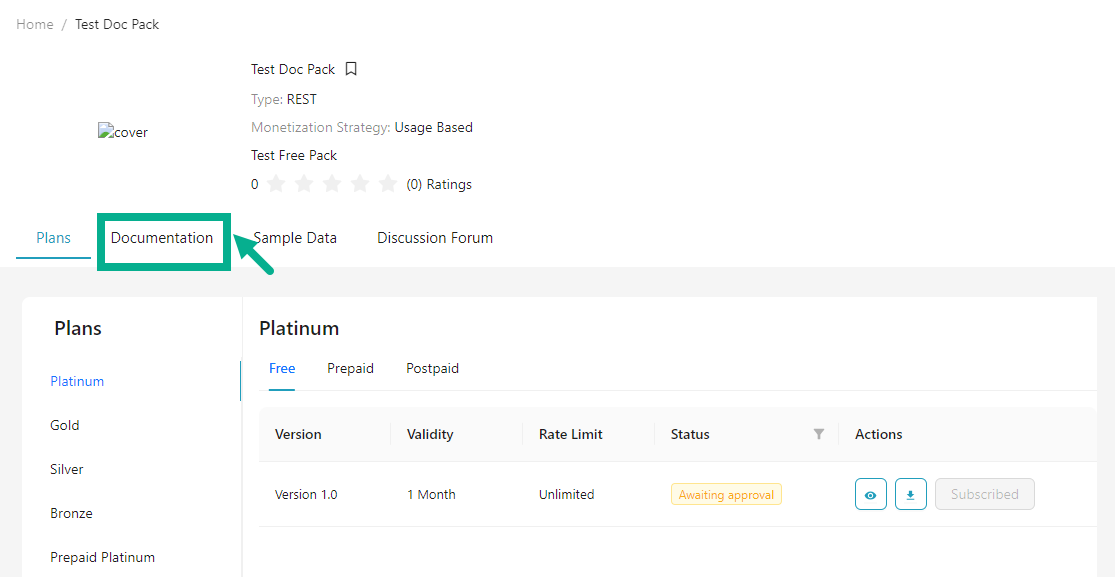
If the user opens the pack, the Plans page appears by default.
- Click Documentation tab.
The Documentation page appears as shown below.
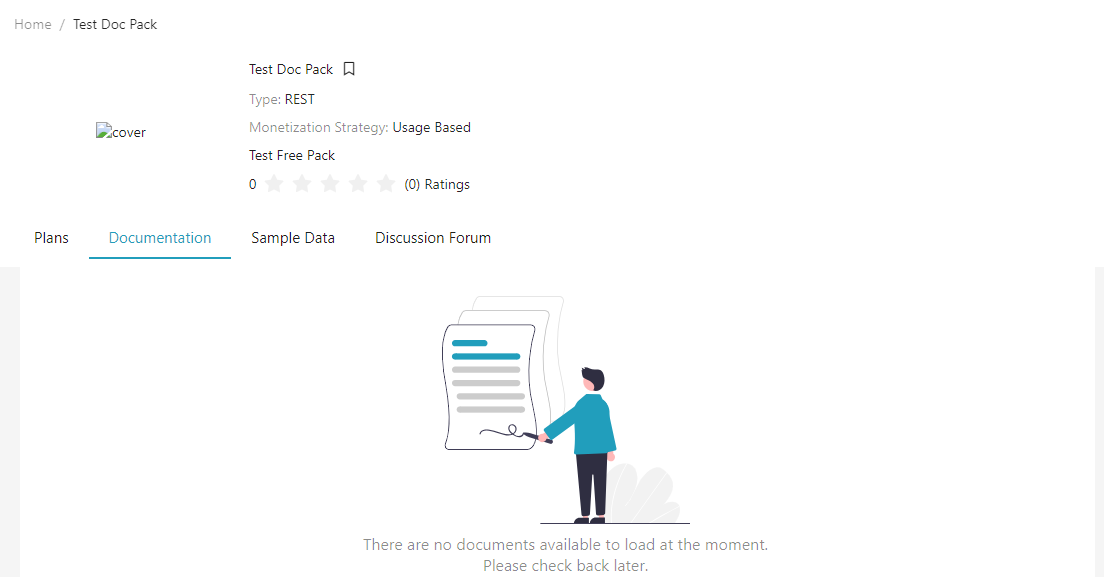
The documentation is displayed only if the publisher user includes it while creating the API pack.
View Sample Data
The Sample Data tab provides code examples that can be used to create a sample API request. It also shows you the sample response you might expect when you submit the sample request.
- Click on the API Pack.
The API Pack detail page appears as shown below.

If the user opens the pack, the Plans page appears by default.
- Click Sample Data tab.
The Sample Data page appears as shown below.
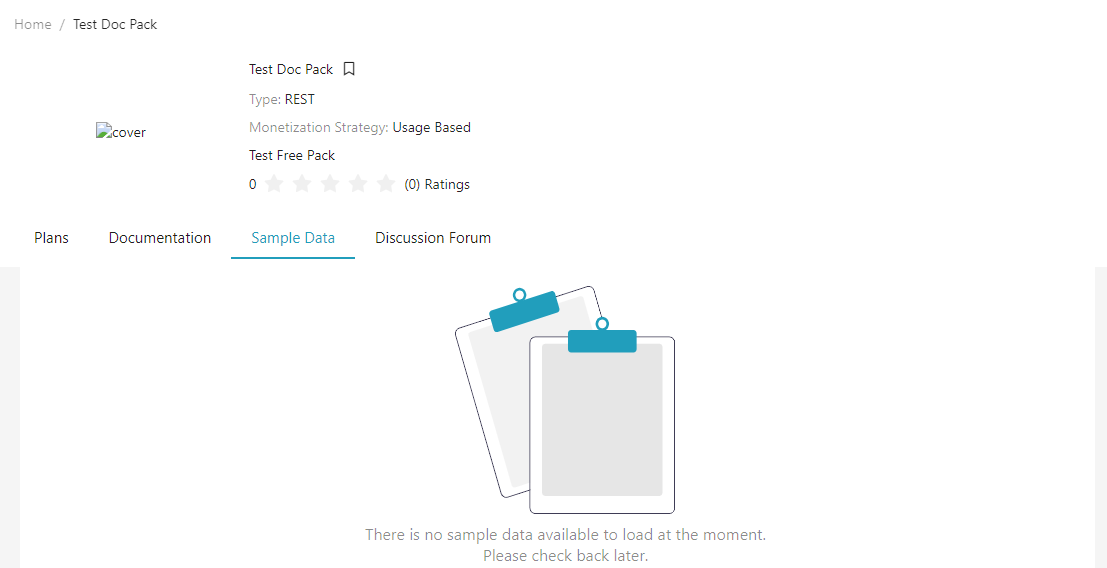
The Sample Data is displayed only if the publisher user includes it while creating the API pack.
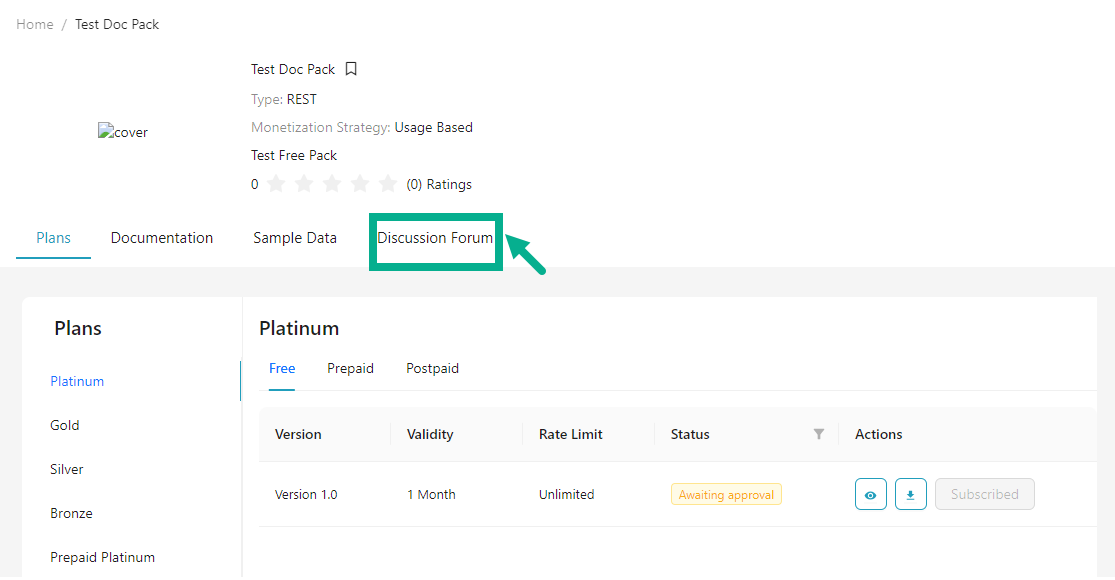
Use the Discussion Forum
The API Pack Details page on the Developer portal includes built-in discussion forum support. An API Pack-specific discussion forum facilitates collaboration and community support for each API Pack. Both new and existing customers can benefit from communicating with other developers who share their interests.
This is a common conversation forum. Please do not disclose any sensitive information.
Add New Discussion
- Click on the API Pack.
The API Pack detail page appears as shown below.
If the user opens the pack, the Plans page appears by default.
- Click Discussion tab.
The Discussion page appears as shown below.
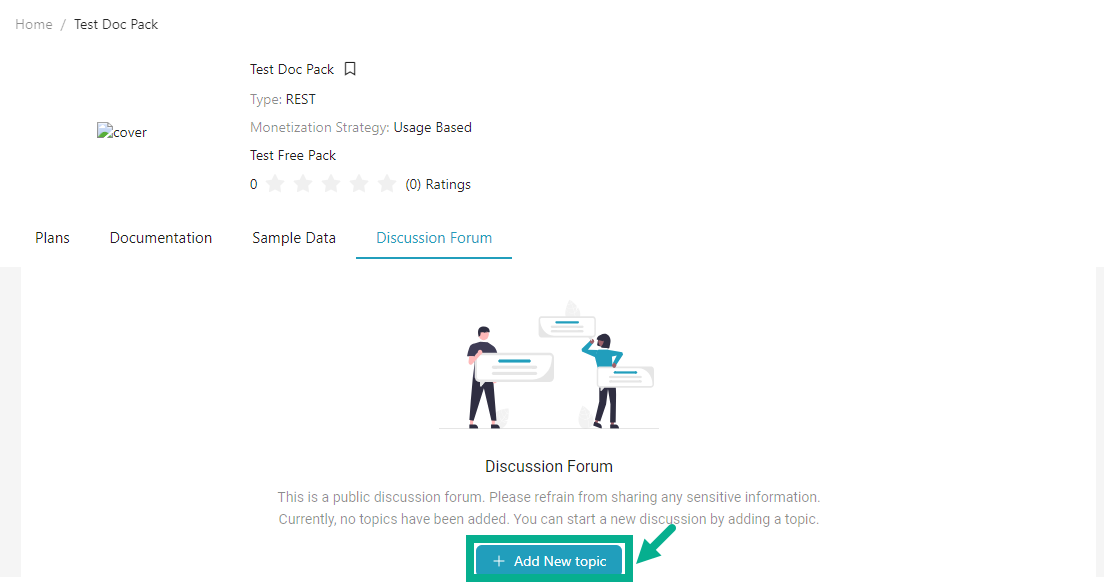
- Click Add Topic.
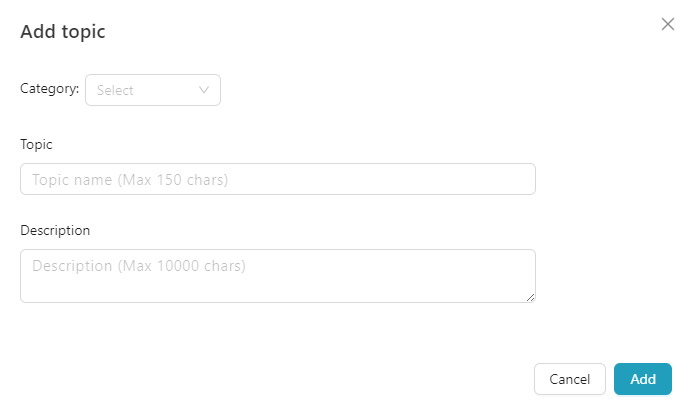
Add Topic dialog box appears as shown below.
-
Select the Category from the drop down.
-
Enter the Topic and Description.
-
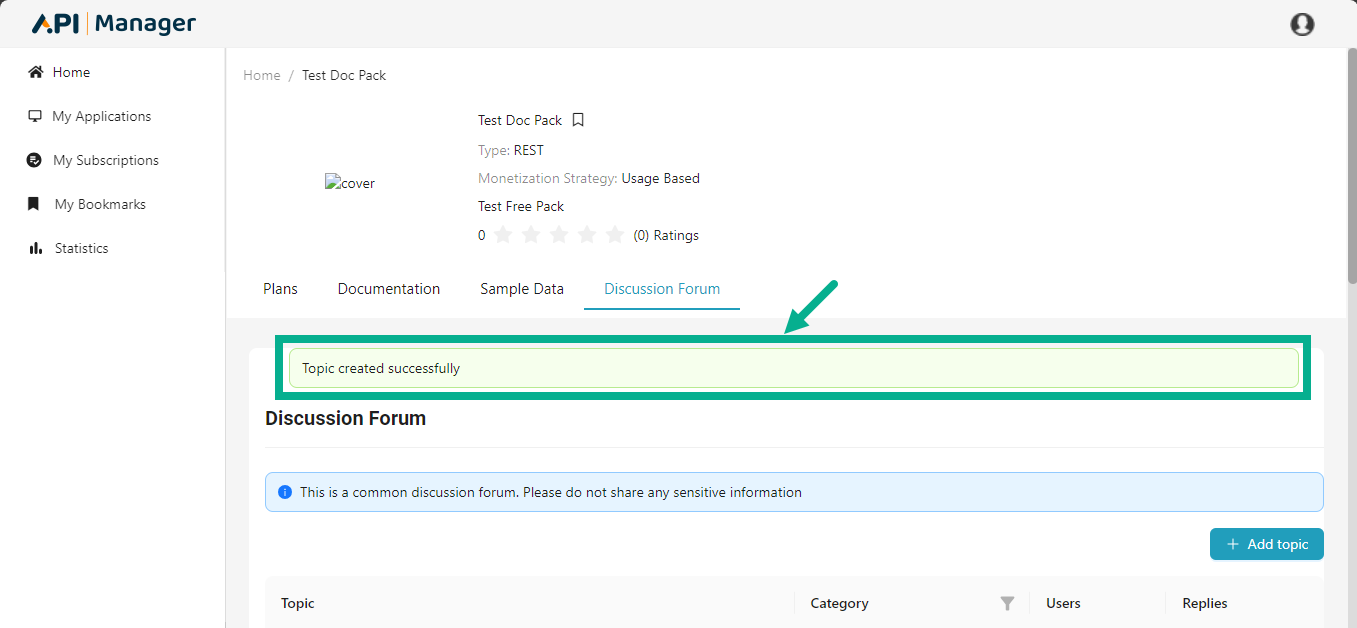
Click Add.
On adding a topic, the confirmation message appears as shown below.
Manage Bookmark
The Developer portal allows you to create new bookmarks and delete them from the home page.
Create a bookmark
- Click the Bookmark icon located in the top right corner of the API Pack.
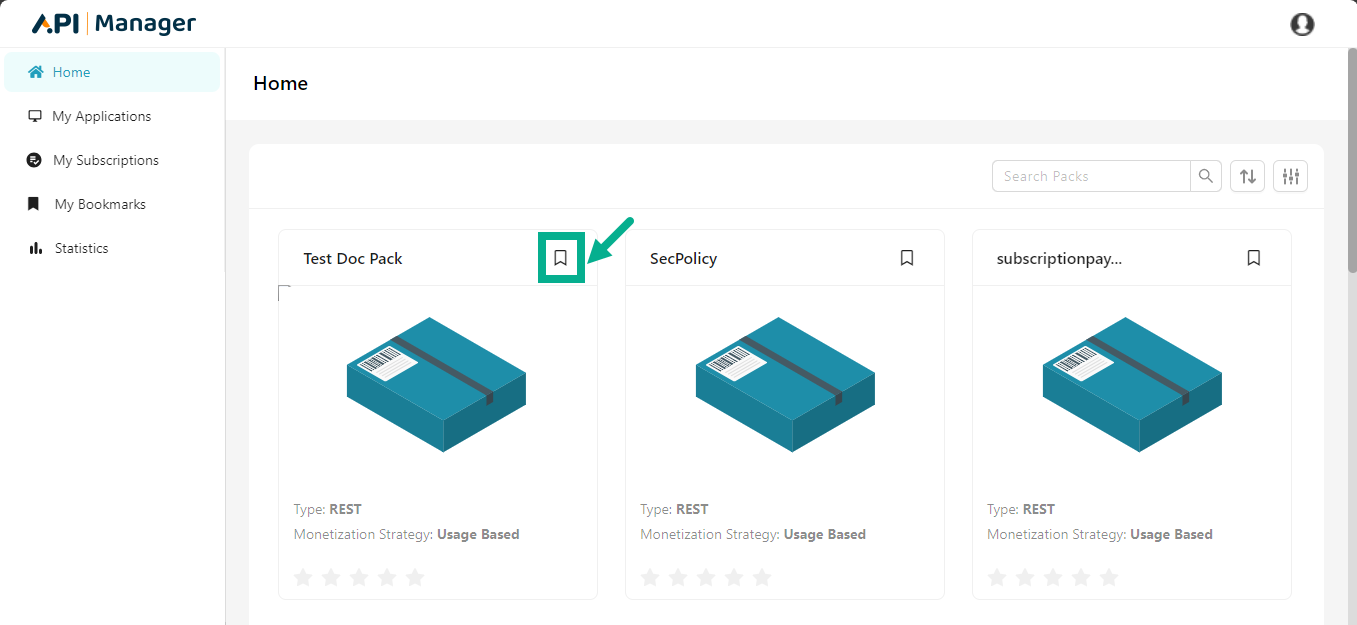
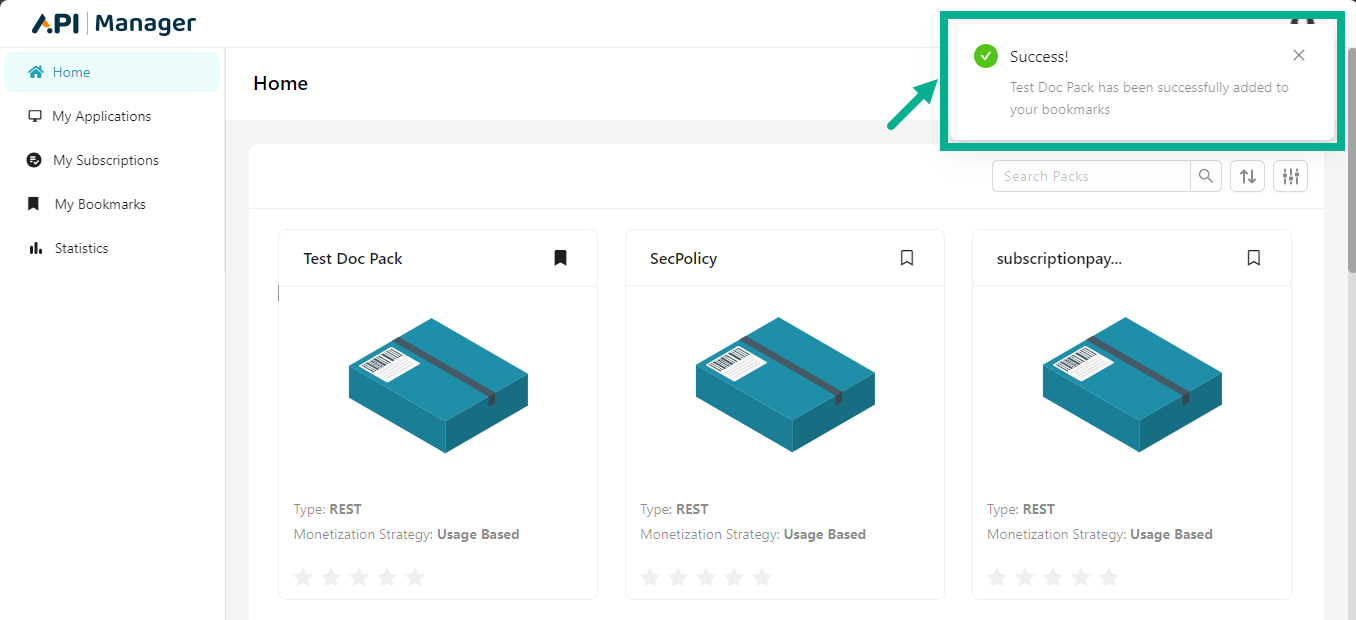
The respective API pack is added to bookmark.
The Bookmark icon is updated and The confirmation message appears as shown below.
Remove a bookmark
- Click the Bookmark icon in the lower right corner of the API Pack that has been bookmarked.

The screen appears as shown below.

- Click OK.
The respective API pack is removed from bookmark.
The Bookmark icon is updated and the confirmation message appears as shown below.

Testing an API using Sandbox
The Sandbox environment enables developers to test and understand how their applications integrate with APIs. It allows sample API calls directly from the documentation page, helping developers identify appropriate API plans by evaluating the number of APIs and consumption methods.
The Sandbox utilizes Swagger to describe the REST API service, including:
- Resource name and description.
- Methods and parameters (form/path/query) with required/optional indicators.
- Expected response content types (JSON or XML).
- HTTP response codes, error codes, and messages.
Sandbox Workflow
Use the following checklist as a guide for utilizing the Sandbox environment:
- Create an Application Profile
- Generate Access Tokens
- Invoke APIs using the Try-it Feature
- Generate Client Code with SDK
- Develop and Integrate Apps with Sandbox Endpoints
- Perform Integration Tests with Sandbox Data
- Validate Token Expiry Scenarios and Simulate Errors
Invoking APIs Using the Try-it Feature
- Click on the API Pack.
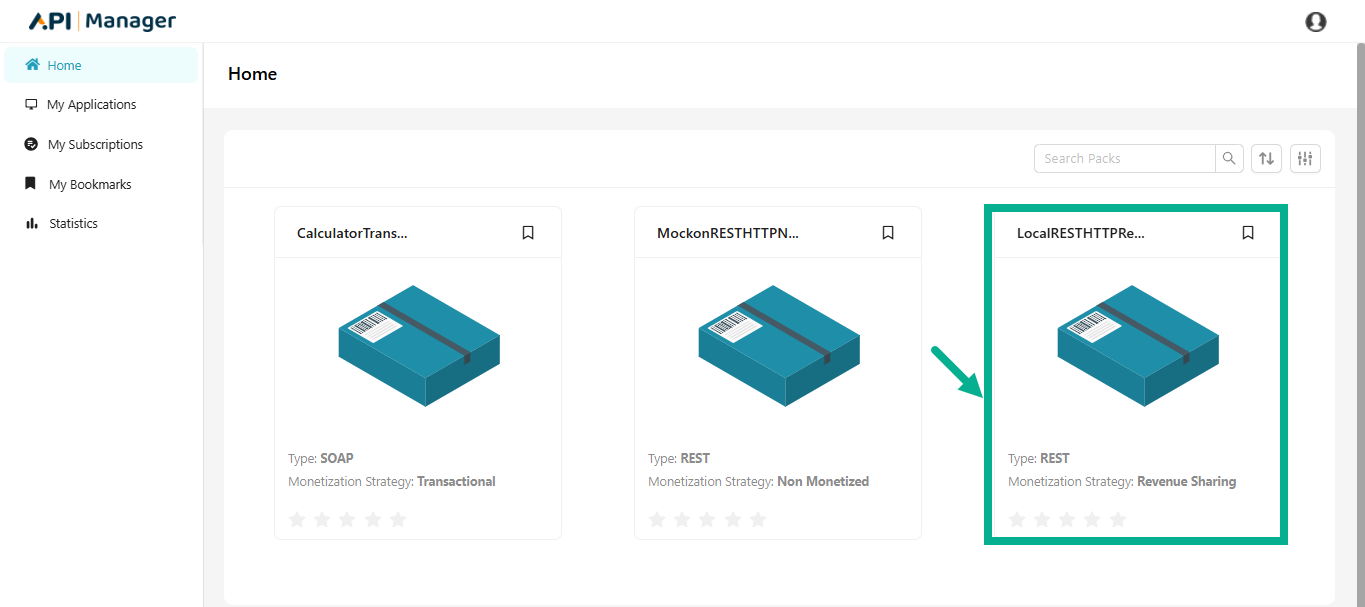
The screen appears as shown below.
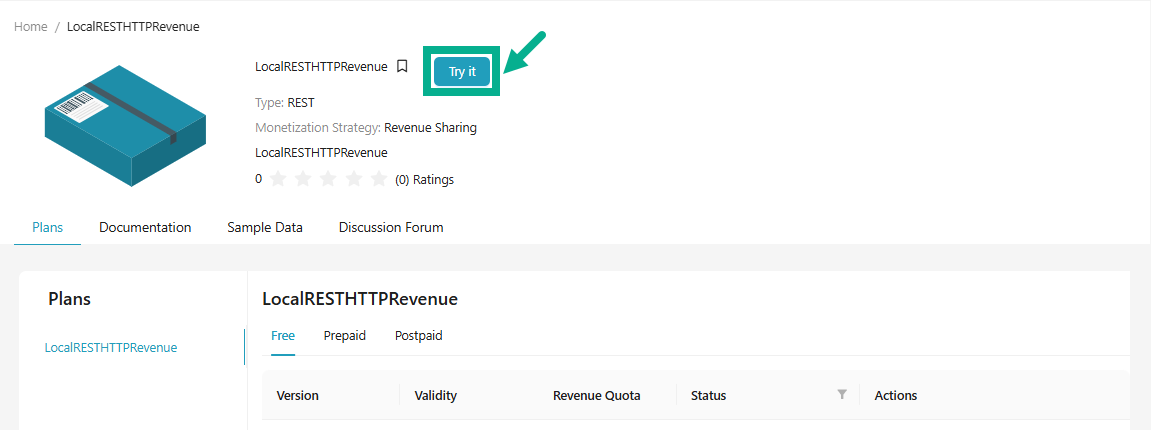
- Click Try it.
The Sandbox page appears as shown below.
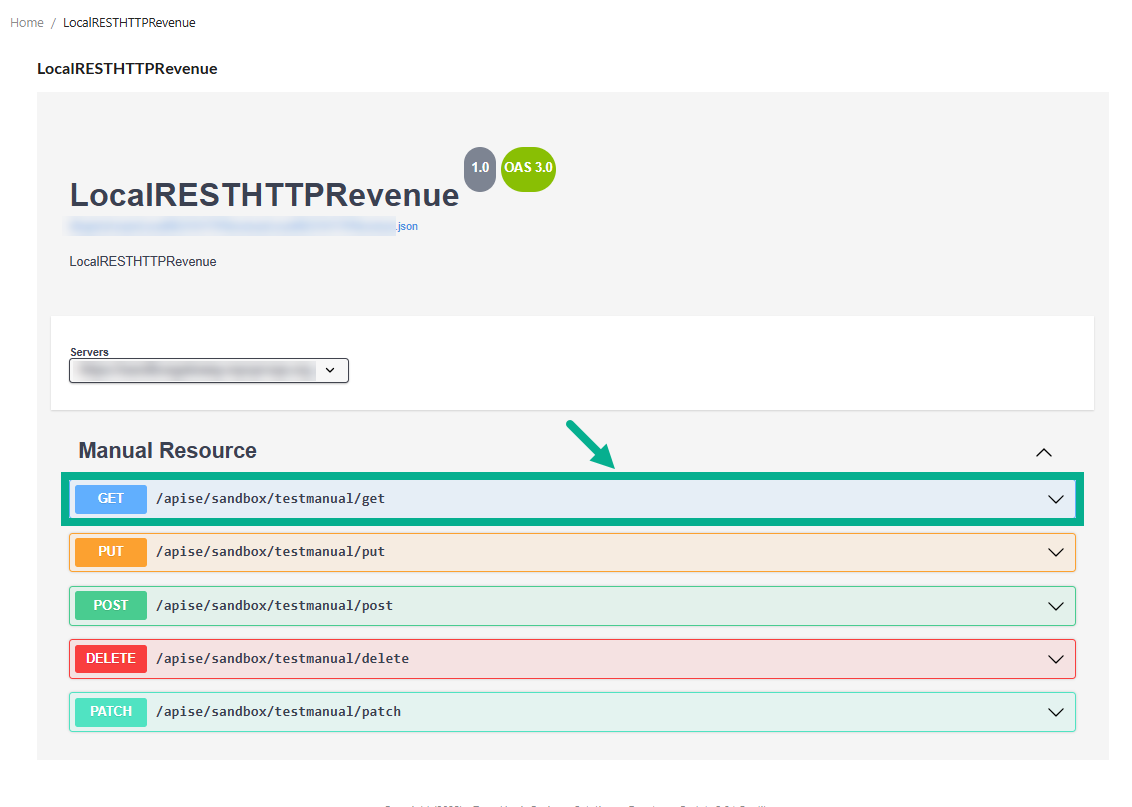
- Click the resource method to expand and display details.
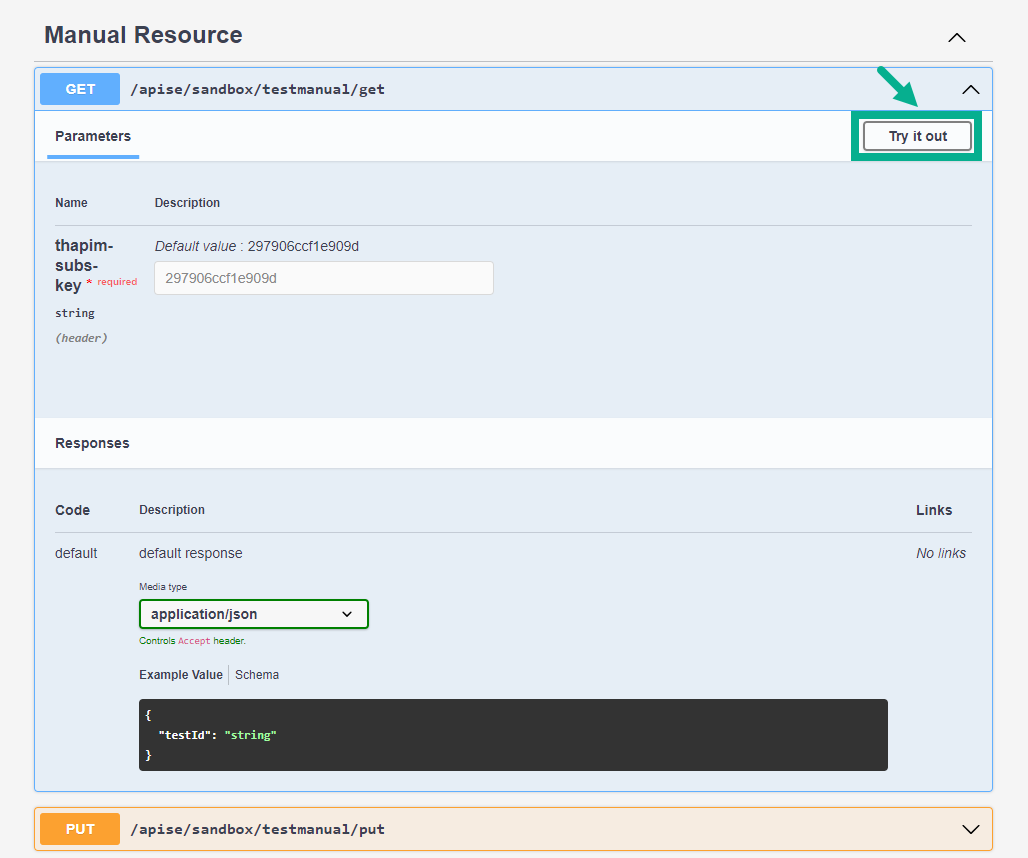
-
Click Try it Out.
-
Enter the required parameters in the mandatory fields and click Execute.
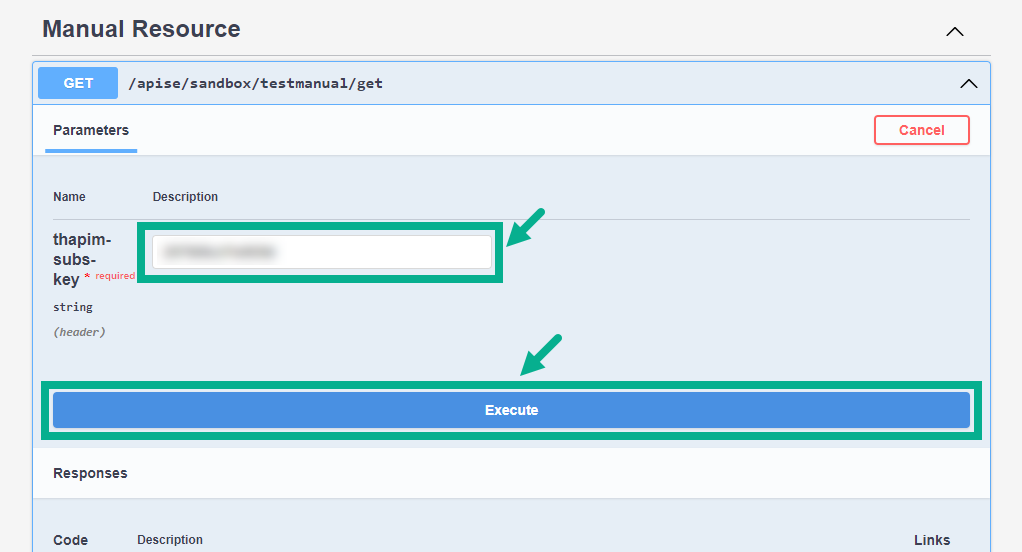
The response message will display based on the input parameters.

Important Considerations for Sandbox Testing
While testing APIs in Sandbox, note the following limitations and behaviors:
- The Try-it feature supports only REST resources configured via Swagger specification files.
- Transaction details and analytics are not stored.
- Auto-propagation to linked plans is not supported.
- Plan-level security policies are not applicable.
- Plans with OAuth security policies do not validate access tokens in Sandbox.
- Rollback functionality is not supported.
- Two-way SSL between the Portal and Nginx is not supported.
- All backend service calls must implement URL encoding.
Character and Configuration Limitations
- IP Blacklisting, Whitelisting, and MCT limits are not applicable.
- Unsupported URI Encoding Characters: # [ ] ~ | %
- Supported Special Characters for Path and Query Parameters: `@ ! # $ % ^ & * - _ = + [] | : ; , . ``
- Supported Special Characters for Resource Names: @ $ space ! * - _ = + . ,
Sandbox Restrictions
- Only one Sandbox Gateway is allowed per publisher account.
- Sandbox plans support only subscription-key authentication.